Prism
Raytraced and Raymarched Wonders
Overview
Prism is my continuously-developed toy renderer project! Using raytracing and raymarching, it
renders geometry and abstract shapes with various lighting and effects to create interesting scenes. It also functions a little
bit as a modeler as to help the user have creative freedom to create whatever scenes they wish. As I keep working on it,
it will continuously improve and support new features and exciting techniques!
Motivation
Despite my project portfolio being quite... diverse, I'm trying to get into a career in computer graphics!
Unfortunately, it's quite hard to break into (at least comparatively to other fields).
Resources to learn are not as nearly as popular, and even in (undergraduate) education it's rarely touched on. And so, this project is what I
hope to be my little crowbar that lets me break my way in. It's a culmination of my self-learning with computer graphics,
all in a nice packaged showcase application that outputs pretty pictures and videos!
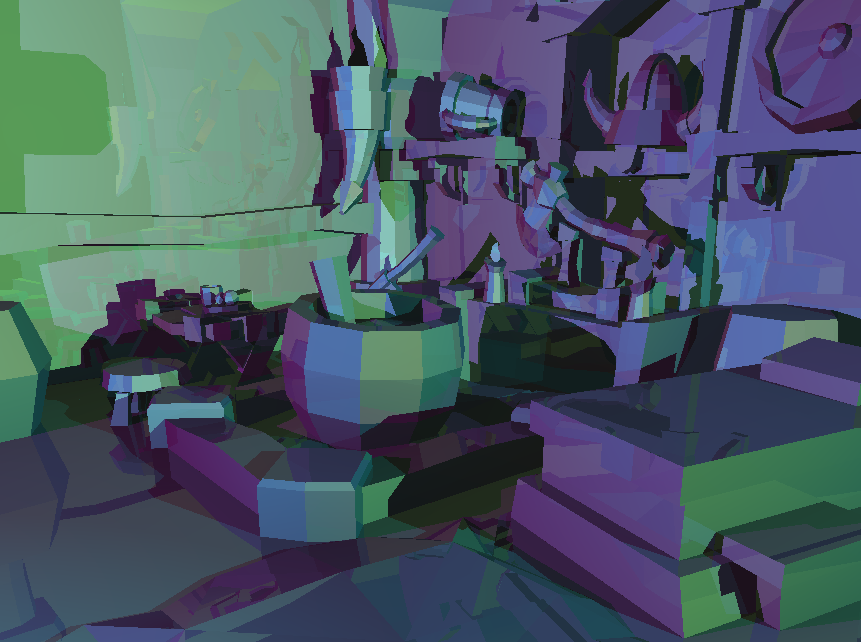
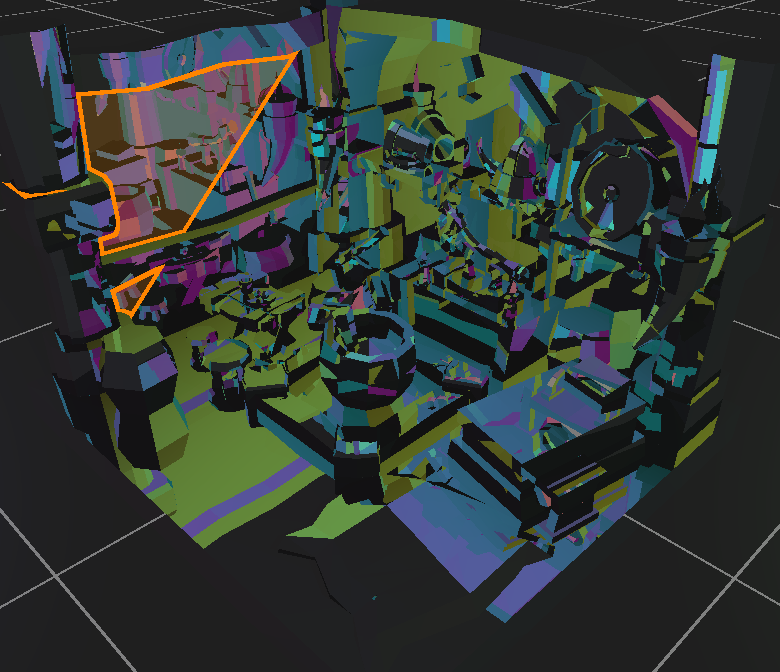
Raytraced "Viking Room"
Technologies
The only external libraries as of now being used are Vulkan and Raylib! I suppose technically I'm using my own
utilities library that I wrote, but I'm not sure that counts. Raylib is used for the UI and window handling while Vulkan is used for
the actual heavy-duty rendering. This means that there is inter-op happening between OpenGL from Raylib and Vulkan itself! The way this
works is that the vulkan backend renders onto a series of 2D texture targets, which then gets passed to OpenGL as textures. These
textures are then just rendered just as an image would be into the UI created with raylib!
While unconventional,
I chose to do it this way for 2 main reasons:
For those who don't know, raylib is a cross platform C library that allows developers to easily create windows, draw textures, integrate shaders, and really anything a game developer could need from an engine. While I preach reinventing the wheel as much as I can, I've remade this wheel before already. And while I could use my own engine, having an official and trusted library that I can fall back on while I experiment with everything else will be very useful. The focus of this project is learning how to raytrace, not to waste weeks on tweaking window properties and inputs between different platforms.
So since raylib runs on OpenGL, why use Vulkan? Why deal with interop when there's no need to? Well, there are 4 main reasons why I chose Vulkan for this project.
- I thought it would be a fun and cool quirk to play around with
- Having the UI and viewport be confidently stable with Raylib/OpenGL will help when experimenting dangerously with Vulkan
Why Raylib?
For those who don't know, raylib is a cross platform C library that allows developers to easily create windows, draw textures, integrate shaders, and really anything a game developer could need from an engine. While I preach reinventing the wheel as much as I can, I've remade this wheel before already. And while I could use my own engine, having an official and trusted library that I can fall back on while I experiment with everything else will be very useful. The focus of this project is learning how to raytrace, not to waste weeks on tweaking window properties and inputs between different platforms.
Why Vulkan?
So since raylib runs on OpenGL, why use Vulkan? Why deal with interop when there's no need to? Well, there are 4 main reasons why I chose Vulkan for this project.
- Vulkan is one of the newest advanced technologies for graphics in general. It has a steep learning curve, so learning it now will no doubt reap many benefits in the future. Not only for industry skills, but it will also require me to become more familiar with the GPU itself and how GPU work is scheduled. It doesn't only have to be used for rendering either, it has plenty of capability to simply do lots of work on the GPU.
- Vulkan is cross platform! As someone who develops a lot for both Windows and Linux machines, this is pretty critical for me, so it at the very least rules out using Metal or DirectX.
- Vulkan is advanced. This means that it has a great potential ceiling. While OpenGL can be very easy to work with, it doesn't quite have the versatility that Vulkan can offer. With Vulkan, the potential to take advantage of hardware-specific features and ultra customized pipelines is very inticing.
- I'm planning on doing as much as I can from scratch. This means rather than the typical vertex-fragment pipeline, I'll be doing everything in compute shaders. Luckily, Vulkan by default supports compute shader functionality on every version and on all hardware!
Features
Prism features plenty of different tools/techniques to aid with rendering! There are two main modes,
raytracing mode and raymarching mode. Both are currently separate, but eventually I'd like to combine the two.
At it's core, prism renders everything via raytracing! There is no rasterizing done, no vertex shaders, no fragment shaders, just compute shaders!
If you don't know how raytracing works, each pixel is a position projected from the camera that is then passed into a compute shader, used to create a ray with a position and direction, and then traced by intersecting with the defined geometry to determine if it was hit or not. It's that simple! With each "hit" pixel, we can then use the calculated distance to the intersection as well as the direction of the normal to then do some basic lighting and view our geometry.

Although eventually I'll probably try adapt to rasterizing triangles and raytracing the triangle pixels instead, I wanted to truly dive into pure raytracing to grasp everything it entails. However, at the core of this technique, it is still very slow. In a brute force fashion, each ray can just cycle through all the triangles one by one, checking each one for an intersection. But since we need to render millions of triangles at a fair speed in order to be any sort of a viable renderer, this is unacceptable. To remedy this, something called a BVH (Bounding Volume Hierarchy) is used.
How this works is that the entire geometry is put into an axis-aligned bounding box, which is just a box that is aligned across the x-y-z axis. This box is then divided across volume (or density depending on an implementation) until every primitive is now in its own box. In doing so, we've effectively rearranged all of our geometry into a binary tree-esque structure.

Now whenever a ray needs to check the geometry for intersections, we can traverse the bounding boxes to narrow down which primitives we need to check by a huge amount! This effectively shoves a log(n) around our previously O(n) runtime per ray, allowing us to render millions of triangles at reasonable speeds!
Prism also features raymarching to do SDF rendering! SDF rendering allows us to make some really cool and unorthodox shapes that would be normally impossible to model with traditional geometry, such as blobs, volumetric clouds, and even fractals!
If you don't know how raymarching and SDFs work, you essentially do the same with raytracing, except you march the ray across space. Instead of calculating whether it intersected or not, you take the distance to the nearest object surface from a given point. You then "march" the point ahead by this given distance until you reach a distance small enough to consider a "hit". By raymarching, we can describe objects with functions to smoothly render irregular shapes without having to define them with millions of polygons.
For the basic shapes this can be pretty fast, although for more complex shapes a larger cap of marches must be applied and thus the frame time to render shapes like the Julia set can get pretty nasty. This is because if a shape is very complex, rays will march in between close surfaces, causing a lot of tiny short interations that quickly reach the max number of marches. This means if there is a surface behind those close surfaces, the ray will never reach that, and we will see "holes" in the SDF shape.

Overall, SDFs are fairly simple to implement. The advantage of SDFs come from the wide range of weird volumes you can render! You can find a list of popular SDFs here, as well as some modification functions! By basically combining any two functions, you can merge these volumes together in ways unheard of and frankly impossible for typical rendering, such as twisting, displacing, extruding, and more!
For lighting, I've implemented basic Phong Lighting. If you want to know more specifically about how this works, I won't bore you with the equations, but you can read more about it on wikipedia. The TLDR of how it works is that we define lights and materials as a combination of ambient, diffuse, and specular constants, which then in turn combine together to make some pretty cool lighting despite being a quick and simple lighting model.
Although it isn't the most physically accurate model, it can still make some pretty cool scenes! This alongside some basic shadows by tracing rays towards light and looking for obstructions, and we can get some pretty neat geometry out of giving our models some reflection.
I have a blog post that really details how I did frameless rendering here if you want to get the whole write-up on it, but essentially what I did was make pixels update randomly as to give the rendering a cool motion blur effect and reduce frame times! While it isn't all that much of a help, the effect on movement is still visually pleasing and looks a little but like this:
Using the power of SDF rendering, I was also able to model some volumes to make a cloud! This is done by modeling light diffusion in a volume by marching through a given SDF shape, which gives it some opaqueness. Then by displacing the surfaces of a sphere a good bit and adding in some softening and shading, a fairly realistic cloud is made!
There are plenty of resources online on how to do this, but what they all do (and what I do) is use the Beer-Lambert Law to essentially "accumulate" visibility as the ray marches through the SDF cloud.
Raytracing
At it's core, prism renders everything via raytracing! There is no rasterizing done, no vertex shaders, no fragment shaders, just compute shaders!
If you don't know how raytracing works, each pixel is a position projected from the camera that is then passed into a compute shader, used to create a ray with a position and direction, and then traced by intersecting with the defined geometry to determine if it was hit or not. It's that simple! With each "hit" pixel, we can then use the calculated distance to the intersection as well as the direction of the normal to then do some basic lighting and view our geometry.
From NVIDIA
Although eventually I'll probably try adapt to rasterizing triangles and raytracing the triangle pixels instead, I wanted to truly dive into pure raytracing to grasp everything it entails. However, at the core of this technique, it is still very slow. In a brute force fashion, each ray can just cycle through all the triangles one by one, checking each one for an intersection. But since we need to render millions of triangles at a fair speed in order to be any sort of a viable renderer, this is unacceptable. To remedy this, something called a BVH (Bounding Volume Hierarchy) is used.
How this works is that the entire geometry is put into an axis-aligned bounding box, which is just a box that is aligned across the x-y-z axis. This box is then divided across volume (or density depending on an implementation) until every primitive is now in its own box. In doing so, we've effectively rearranged all of our geometry into a binary tree-esque structure.
From NVIDIA
Now whenever a ray needs to check the geometry for intersections, we can traverse the bounding boxes to narrow down which primitives we need to check by a huge amount! This effectively shoves a log(n) around our previously O(n) runtime per ray, allowing us to render millions of triangles at reasonable speeds!
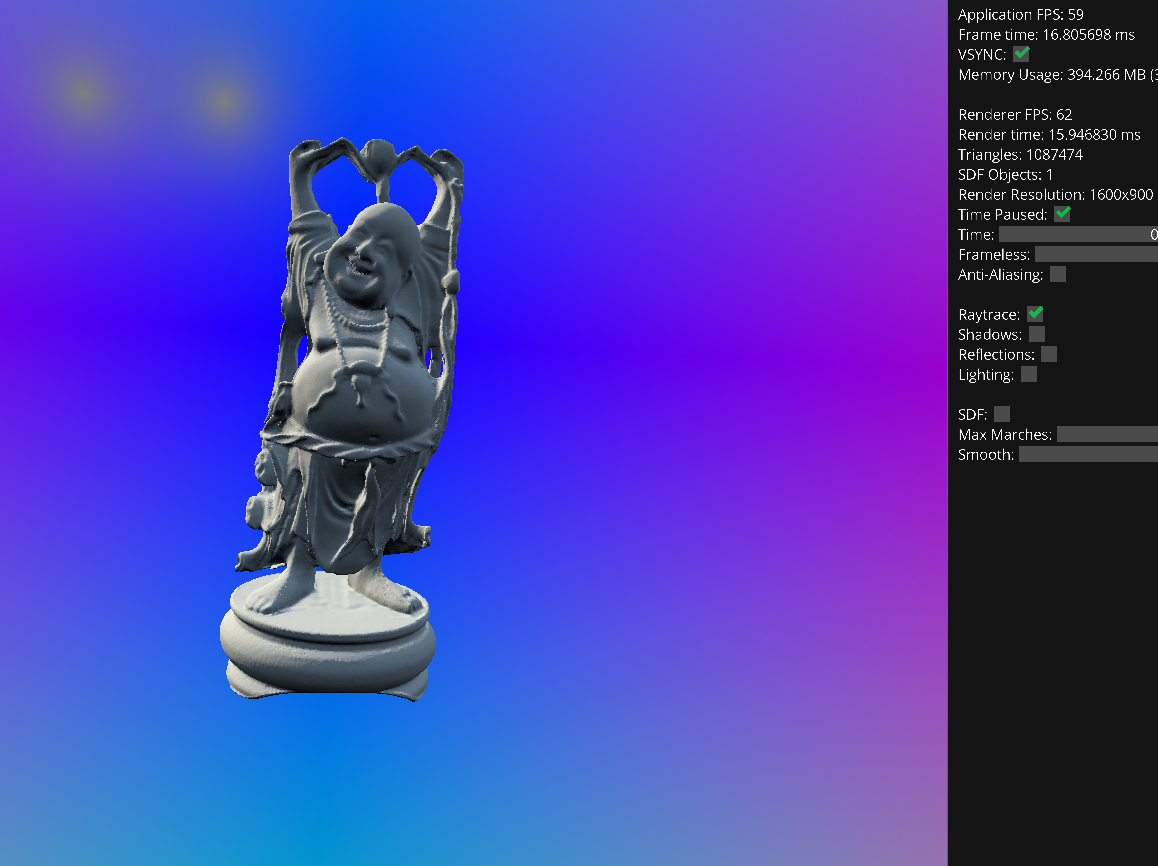
60 FPS on the 1 million triangle "buddha"
SDF Rendering / Raymarching
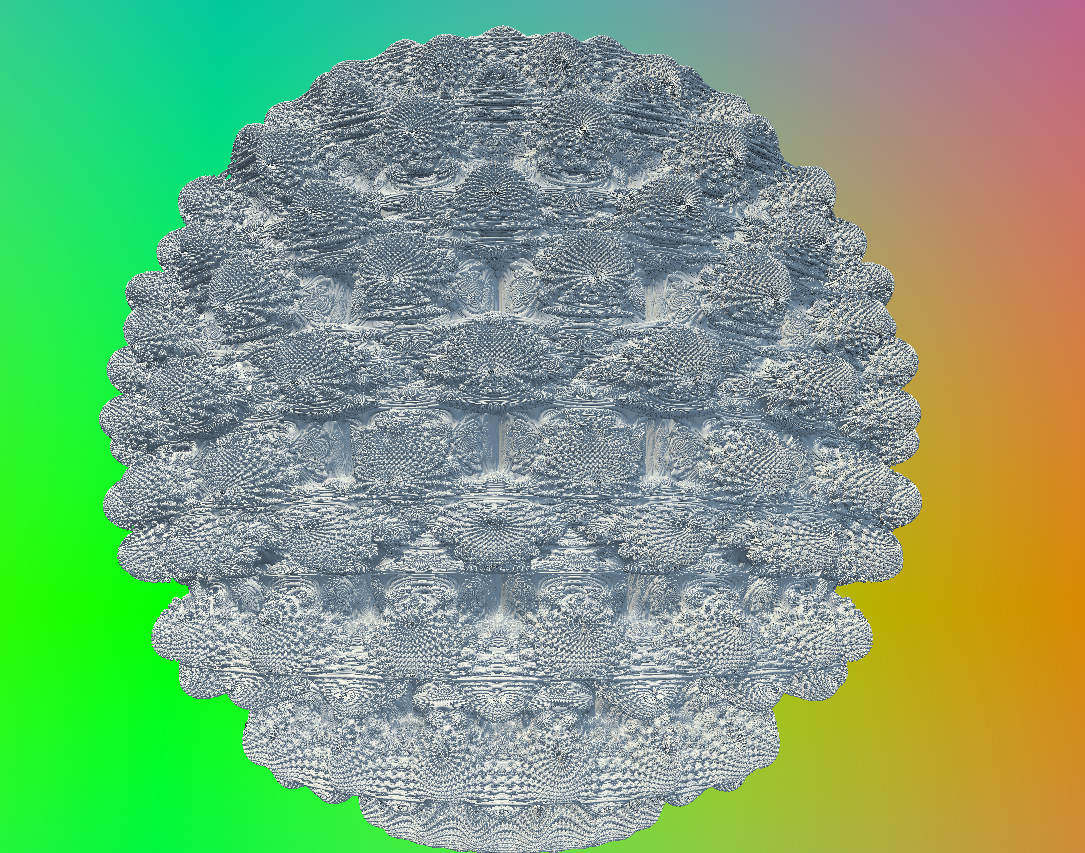
Prism also features raymarching to do SDF rendering! SDF rendering allows us to make some really cool and unorthodox shapes that would be normally impossible to model with traditional geometry, such as blobs, volumetric clouds, and even fractals!
Mandelbulb fractal
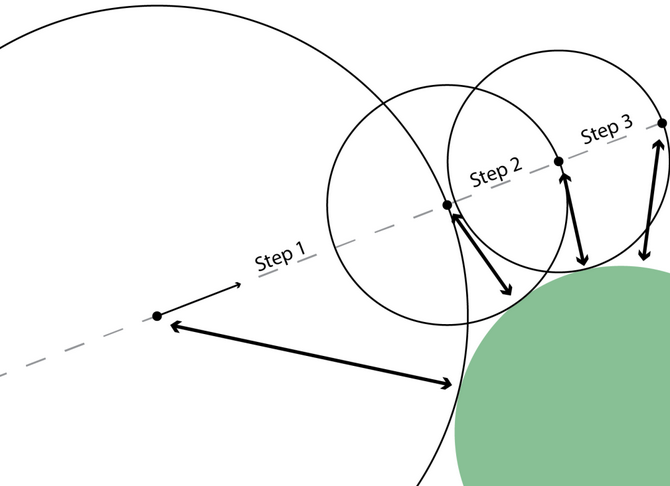
If you don't know how raymarching and SDFs work, you essentially do the same with raytracing, except you march the ray across space. Instead of calculating whether it intersected or not, you take the distance to the nearest object surface from a given point. You then "march" the point ahead by this given distance until you reach a distance small enough to consider a "hit". By raymarching, we can describe objects with functions to smoothly render irregular shapes without having to define them with millions of polygons.
From jasmcole
For the basic shapes this can be pretty fast, although for more complex shapes a larger cap of marches must be applied and thus the frame time to render shapes like the Julia set can get pretty nasty. This is because if a shape is very complex, rays will march in between close surfaces, causing a lot of tiny short interations that quickly reach the max number of marches. This means if there is a surface behind those close surfaces, the ray will never reach that, and we will see "holes" in the SDF shape.
Julia set fractal
Overall, SDFs are fairly simple to implement. The advantage of SDFs come from the wide range of weird volumes you can render! You can find a list of popular SDFs here, as well as some modification functions! By basically combining any two functions, you can merge these volumes together in ways unheard of and frankly impossible for typical rendering, such as twisting, displacing, extruding, and more!
Phong Lighting
For lighting, I've implemented basic Phong Lighting. If you want to know more specifically about how this works, I won't bore you with the equations, but you can read more about it on wikipedia. The TLDR of how it works is that we define lights and materials as a combination of ambient, diffuse, and specular constants, which then in turn combine together to make some pretty cool lighting despite being a quick and simple lighting model.
Some neat reflection effects
Although it isn't the most physically accurate model, it can still make some pretty cool scenes! This alongside some basic shadows by tracing rays towards light and looking for obstructions, and we can get some pretty neat geometry out of giving our models some reflection.
Frameless Rendering
I have a blog post that really details how I did frameless rendering here if you want to get the whole write-up on it, but essentially what I did was make pixels update randomly as to give the rendering a cool motion blur effect and reduce frame times! While it isn't all that much of a help, the effect on movement is still visually pleasing and looks a little but like this:
Frameless Rendering
Volumetric Rendering
Using the power of SDF rendering, I was also able to model some volumes to make a cloud! This is done by modeling light diffusion in a volume by marching through a given SDF shape, which gives it some opaqueness. Then by displacing the surfaces of a sphere a good bit and adding in some softening and shading, a fairly realistic cloud is made!
Small Pink Cloud
There are plenty of resources online on how to do this, but what they all do (and what I do) is use the Beer-Lambert Law to essentially "accumulate" visibility as the ray marches through the SDF cloud.
What's to Come
Right now it definitely isn't the most performant software, and there's plenty of
ways to do better lighting and model different materials! I'm still working on brushing up volumetric rendering,
but I plan on working on upgrading my lighting beyond phong lighting and doing some path tracing next!!